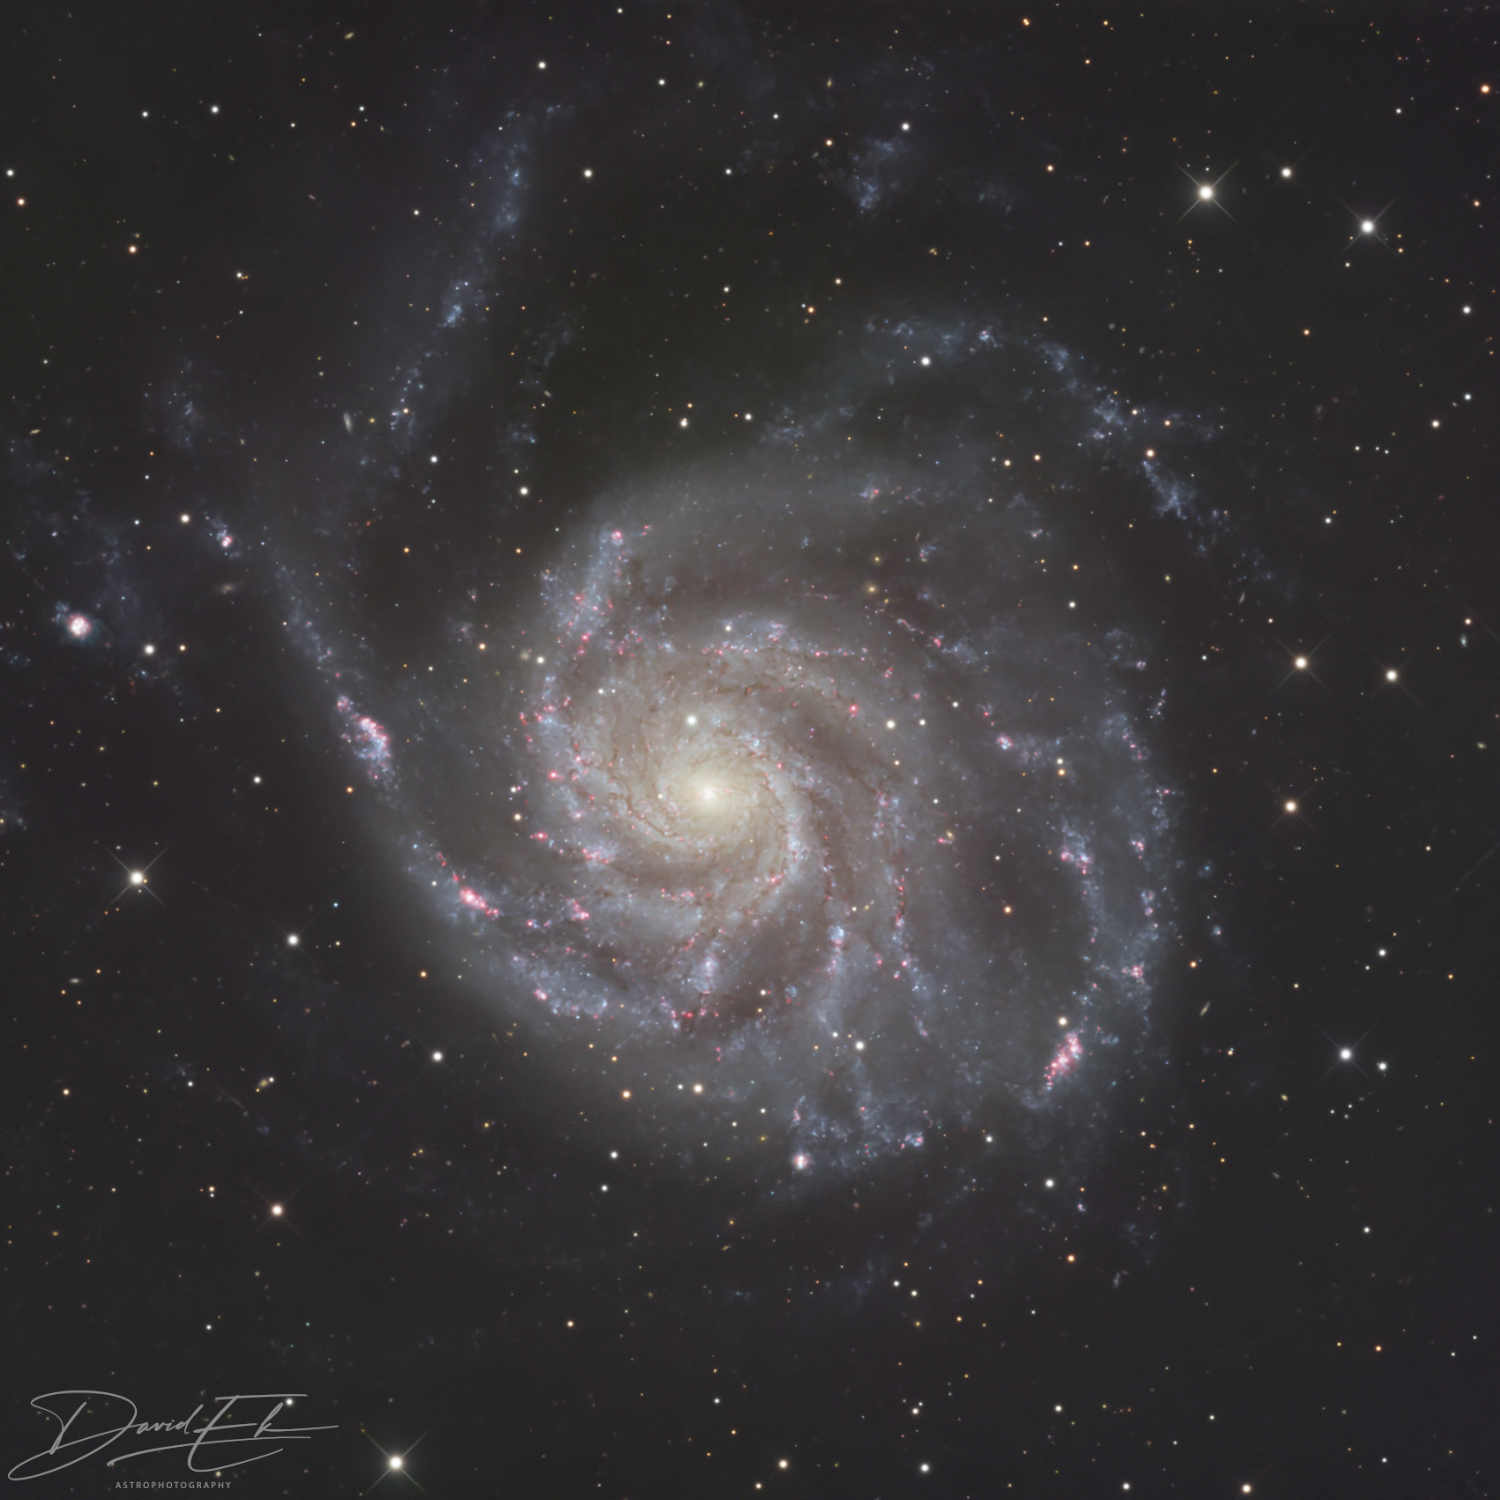

As usual, summer in the Rocky Mountains here in Colorado has not been conducive to astrophotography. My last shooting session was in mid-June, where I was treated to three consecutive nights of clear dark skies. At the time, the only scope I had in ready-to-shoot condition was my Apertura Carbonstar 6″ Ritchey-Chretien (RC), which I consider to be still in the “shakedown cruise” phase of its life. It seems like a decent performer, although I still need to dedicate an evening to fine-tuning the collimation. But impatience got the best of me and I decided to forego additional collimation efforts in favor of grabbing as much time as I could to collect photons from a favorite target of mine, the Pinwheel Galaxy (M 101).
The Setup
The Pinwheel seemed like an ideal subject for the 6″ RC given its size and brightness. My plan was to shoot LRGB plus some H-alpha to make the image a bit more interesting. My camera of choice for the 6″ RC is a ZWO ASI533MM Pro. With its smaller sensor, the subs from this camera consume less storage than a larger sensor, and the square format of the sensor actually makes framing easier. The camera is an excellent performer, in my opinion, having very little dark current and no amp glow.
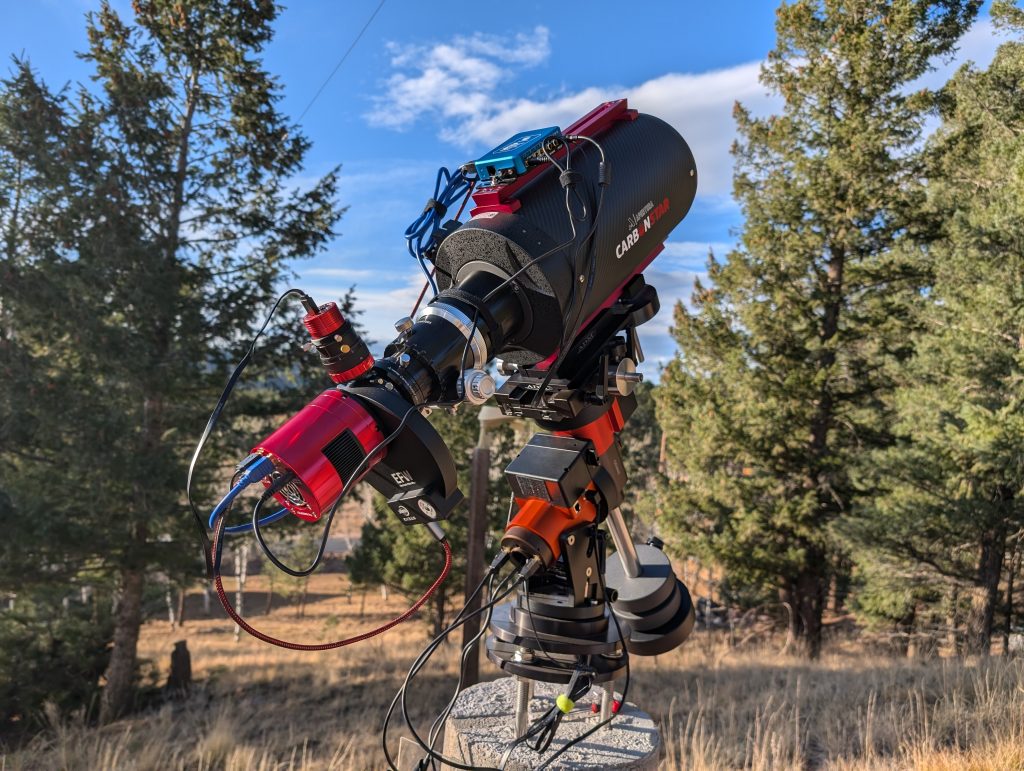
The native focal length of the 6″ RC is 1377 mm (f/9), a sweet spot for a lot of galaxies. But anytime you’re imaging at a longer focal length like this, guiding becomes more of a challenge. A separate guide scope of suitable focal length can be quite large, and at longer focal lengths any differential flexure is magnified. Off-axis guiding is challenging, too, because most scopes with longer focal lengths have smaller image circles, so plucking off a bit of the image without shadowing the main camera sensor is a trick. The ASI533MM Pro’s smaller sensor makes it easier to push the off-axis guider (OAG) mirror a little farther into the image circle. Up to this point I’d been using ZWO’s standard OAG but I recently upgraded to the Askar OAG with its larger mirror and 54-mm clear aperture. I coupled this with an ASI174MM mini guide camera and its larger sensor to capture as much off-axis light as possible. This combination gave me better results than the ZWO OAG and ASI290MM mini camera with its small sensor I’d been using up to this point.
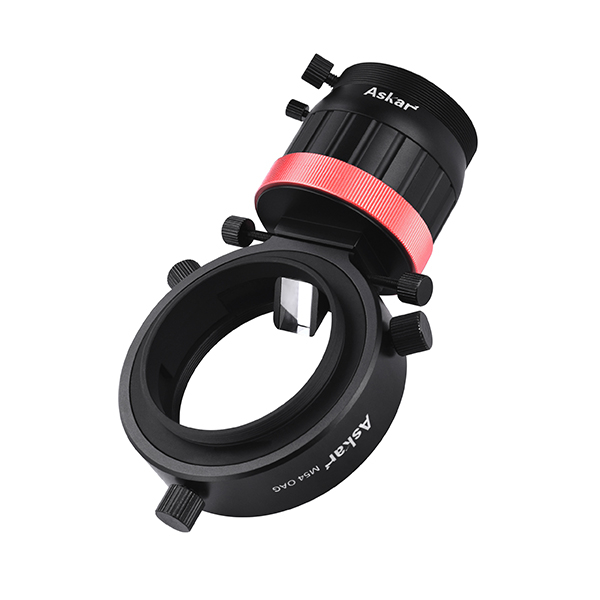
This setup is approximately in focus when the focal plane of the sensor is about 230 mm behind the back plate of the telescope (no reducer or corrector is being used). I generally do a rough focus during the day, using the top of Pike’s Peak (about 12 miles to the south of me) as a suitably-distant focusing target. Even then, the focus will need to be fine-tuned under the stars. One nice thing about this particular RC is that its optical tube is carbon fiber and doesn’t exhibit a ton of expansion/contraction as temperature changes, at least in my experience.
Capture
I start shooting around astronomical dusk once I’ve checked my polar alignment and run PHD2’s calibration and guiding assistants. For the Pinwheel Galaxy, I chose to shoot a sequence of three 5-minute luminance exposures followed by single 5-minute exposures in red, green, and blue, and (only for the first night) a single 10-minute exposure in H-alpha. I programmed N.I.N.A. to repeat this sequence until astronomical dawn. I shot sky flats (and accompanying darks) each morning around sunrise using N.I.N.A.’s FlatWizard. Because I shot this target near the summer solstice, I didn’t get a lot of time on target each night. After tossing the worst subs (due mostly to terrible satellite trails or occasional guiding hiccups), I managed to collect about 12 hours of usable subs (67 in L, 23 in R, 19 each in G and B, and 8 in H-alpha) over the three-night window of clear skies.
Processing
As always, I use PixInsight’s Weighted Batch Preprocessing (WBPP) script, calibrating each night’s subs separately before stacking them into master light frames. Once I have the masters, my processing workflow looks like this:
- Use MultiscaleGradientCorrection (or GradientCorrection) to remove gradients in each of the five masters (L, R, G, B, and H-alpha)
- Use ChannelCombination to combine the R, G, and B masters into an RGB image
- Use SpectrophotometricColorCalibration (SPCC) to calibrate the color of the RGB image
- Use ImageIntegration to combine the L, R, G, and B masters into a synthetic luminance image
- Apply deconvolution such as BlurXTerminator as needed to the synthetic luminance, RGB, and H-alpha images
- Apply noise reduction such as NoiseXTerminator as needed to the synthetic luminance, RGB, and H-alpha images
- Combine the RGB and H-alpha images into an RGBHa image (more on that below)
- Delinearize the RGBHa and synthetic luminance images using HistogramTransformation, MultiscaleAdaptiveStretch, GeneralizedHyperbolicStretch, or whatever stretching process you prefer
- Combine the synthetic luminance and RGBHa nonlinear images into an LRGBHa image using LRGBCombination
- Apply any desired additional stretching, saturation, or other corrections
The PixInsight YouTube channel has a great tutorial video series on processing images in LRGB and H-alpha, and I generally follow that workflow for an image like this one. One of the videos in the series spends a fair amount of time on the process of adding the H-alpha data to the RGB image. Here’s the first video in the series:
How convenient that this video tutorial uses the Pinwheel as its example!
I know there are a million image processing tutorials available on YouTube, but quality varies. I find myself avoiding most of them in favor of those that have been published by the PixInsight team. I won’t necessarily follow their tutorials exactly–the PixInsight team doesn’t generally employ third-party tools like Russell Croman’s XTerminator tools in their tutorials, but I’m not afraid to substitute in those tools when I think they’re useful.
Mostly where I still struggle with image processing at times is at decision points like determining how much deconvolution or noise reduction is appropriate, how far to stretch the image, how much saturation to apply, etc. These are mostly artistic decisions, and my artistic skills and judgment are still developing. I’m reasonably pleased with how this latest Pinwheel Galaxy image turned out, though.
You can see the full complement of hardware and software I used to capture and create this image on its Astrobin page.